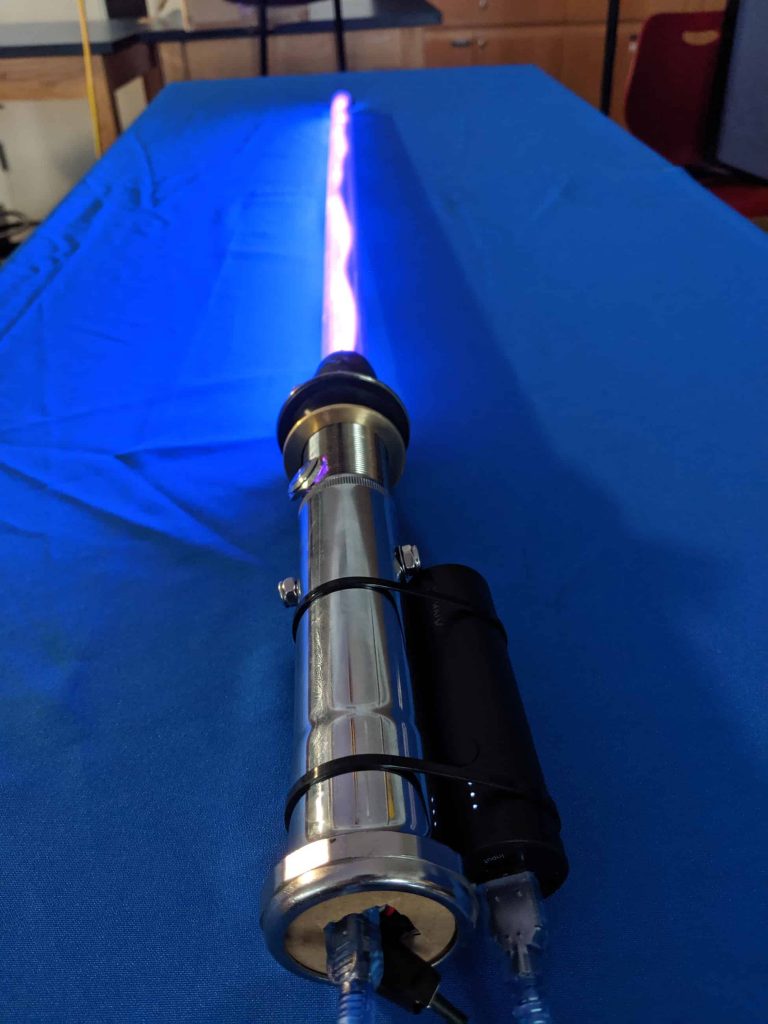
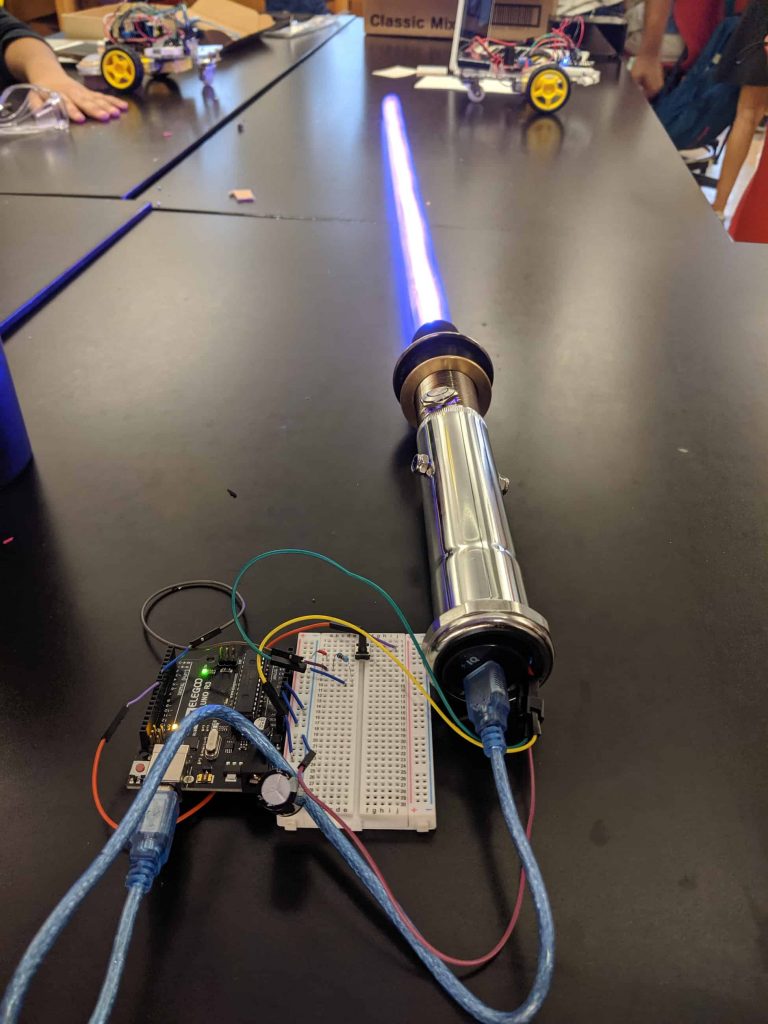
Lightsaber
The NeoPixel Lightsaber is made up of two components, the physical hilt and blade, as well as the Neopixels and microcontroller. The hilt is constructed from two pieces, a drain pipe and a drain extenstion pipe . The blade is a simple polycarbonate tube that is glued to the the top of the hilt. The NeoPixel strip is connected to the microcontroller on the outside of the hilt which takes data from the button and controlls the lights. The whole lightsaber is powered by an external battery on the outside the lightsaber
| Engineer | School | Area of Interest | Grade |
|---|---|---|---|
|
Wes Y. |
Bard Highschool Early College Manhattan |
Engineering |
Incoming Junior |
FINAL MILESTONE
SECOND MILESTONE
The Second Milestone of this project was to construct the hilt and the blade of the lightsaber. The two drain pieces were cut and then bolted together using a single 1/4 in bolt with a nut on either side of the hilt. A 5/8 in hole whas then drilled into the top of the hilt in order to make space for the button. The blade, made up of a single polycarbonate tube, wraped in a thin foam material and then glued into the top part of the hilt. The electronics were then inserted into the base of the hilt.
FIRST MILESTONE
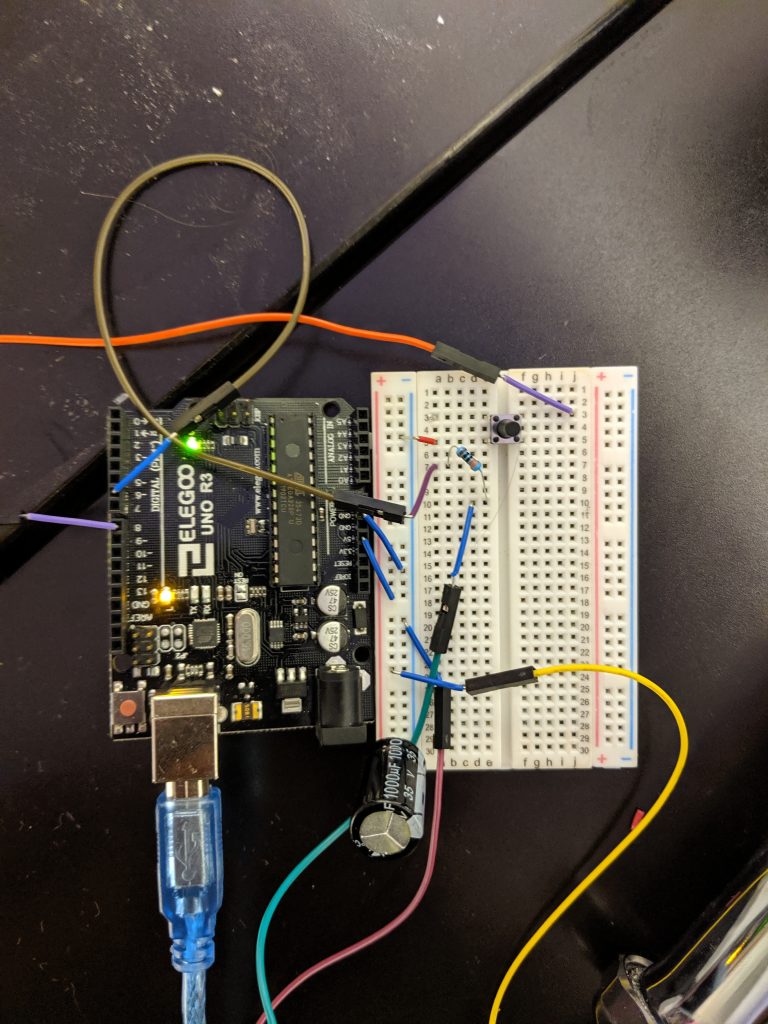
The First Milestone of my project was the electronics portion of the lightsaber. The code was uploaded onto the Arduino Uno and was programmed to illuminate the NeoPixels in the upwards direction when the button is pressed and then to turn off the NeoPixels in the opposite direction when the button is pressed again. I faced multiple challenges during this portion of the project in referance to the multiple fried Arduino Nanos and mistakes in my code. Ideally, the NeoPixels would run off of the Arduino Nano instead of the Uno because it would allow me to store all of the electronics inside the hilt of the blade. However until then only the battery and lights can be stored inside the blade and hilt.
STARTER PROJECT
HOW IT WORKS
The Useless Machine is powered by three AAA batteries which power a single Common Cathode red and green LED and a single gear motor. When the toggle switch on the top of the box is flipped it completes the first circuit which allows a current to flow through the anode of the green light and through the motor which rotates the actuator in the counter-clockwise direction until it flips the toggle back to the “Off” position. At this point the circuit controlled by the toggle switch is broken and the current controlled by a limit switch positioned under the actuator is completed. The current then flows through the anode of the red light, and in the reverse direction through the motor which flips the polarity and moves the actuator in the clockwise direction until it returns to the home position. When the actuator returns to the home position it depresses the limit switch and breaks the circuit which turns the machine off.
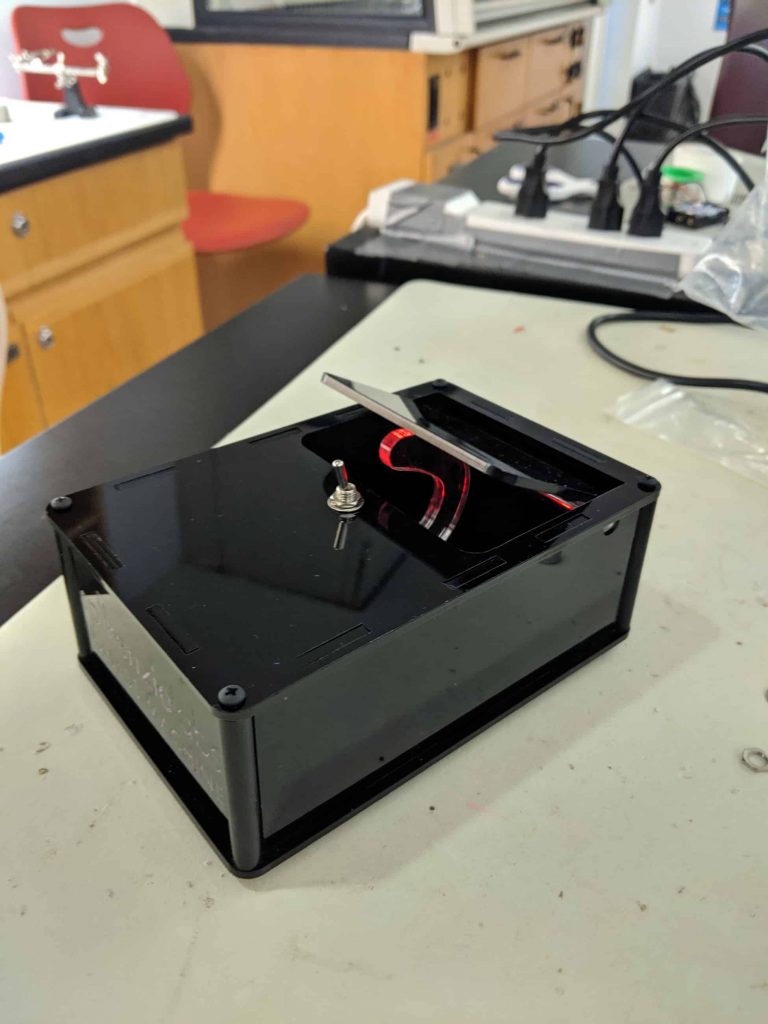
My Starter Project is the Useless Machine, which is a soldering and construction kit. When the toggle on the box is switched on a small plastic arm is raised out of the box until it flips the toggle back off. At that point the small arm then retracts back into the box until it reaches its original position once again concealed in the box. I enjoyed working on this project because it was good soldering and mechanical construction practice.