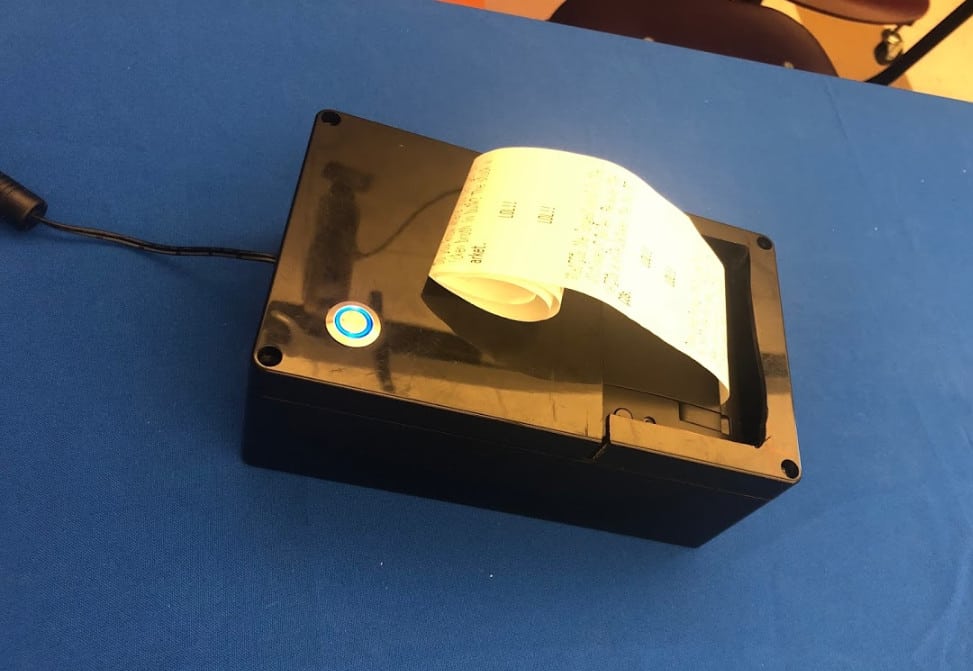
The Joker Box is made of three main components which are the Raspberry Pi, printer, and the casing around them. The case is there to protect the Pi and to make neat of the wires.
Now I could sit here and write a reflection about how I learned so much in past six weeks from Blue Stamp and a lot of other true things. Of course I learned how to problem solve better. However, from this experience it’s more than just learning. That’s just the surface. There are more reasons to join the Blue Stamp team. What I will take from this most is the thought of I did something. Maybe not something big. It’s no cure for cancer or brand new technology but it’s something that has put me above everybody trying to get where I’m going. I have a head start in my computer science classes and something to put on my college resume that not many others will have. And the staff there just add to it all. Being how nice they are. A well spent summer.
FINAL MILESTONE
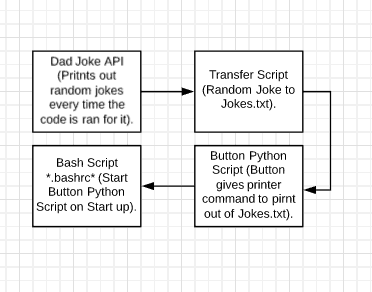
For my third and final milestone I have made the printer run the joke printing scripts on start up and put the Raspberry Pi, Print, and Button in the box. It all works like a big system that builds upon itself. First I started with the Dad Joke API that runs in the shell script Dad-Jokes.sh A shell script is a computer program. Also known as a command-line interpreter. This is what calls the random joke see Figure 1. After that the joke goes to a shell script I made transfer.sh and this script takes the joke and puts it into a text file called Jokes.txt see Figure 2. From here we go into a python script called button.py and what this script basically does is read the first line within the text file Jokes.txt see Figure 3. When the button on the box is pushed button.py is given permission to read and print the joke out. That is what I had done before but it was all neatened up. This milestone is about the next script that I wrote. So now that the printer and button can take and give commands I used .bashrc to make this process run automatically when I give the printer power, see Figure 4. .bashrc is a shell script that Bash runs whenever it is started interactively. It initializes an interactive shell session and bash is basically a command language. You can put any command in that file that you could type at the command prompt. During this stage of the project coding for the scripts to run when the Raspberry Pi booted up was the most difficult part. There were many script written to do different task we ended up making sense of them all. Through it all I was able to learn about all kinds of Linux programs and codes which could be very beneficial for my future if I decide to be a coder or work with it. Linux is the best-known and most-used open source operating system.
Figure 5: This is the process I described above for the visual learners like myself out there.
SECOND MILESTONE
My overall project is now nearly complete. For my second milestone, I hooked a Dad Joke API up to my LED button. Now when you press the button, the Raspberry Pi gets a command to run a shell script that’s connected to an application programming interface (API) used for fetching random “Dad Jokes” (https://icanhazdadjoke.com). Every time the button is pushed the Raspberry Pi prints the joke out on the monitor. See figure 2 for the results. My next step is connecting the printer so that jokes will print out of the printer instead of onto the screen. An API is a set of functions and procedures allowing the creation of applications that access the features or data of an operating system, application, or other service. Shell scripts are computer programs designed to be run by the Unix shell (a command-line interpreter), which in this case allows me to pull information from a given website. See figure 1 for how to do this. This took a while to accomplish simply because it requires large amounts of coding and a lot of downloads. This is a very important part of the Joker box because this is the main function and purpose for this project. I learned about some general coding things that I had to use in order to give the button the power to command the jokes like the shell scripts described. From this I learned that small typos such as miscapitalized letters or missing punctuation can make a really big impact on my code. I made many mistakes in this process while coding and creating files. Most of my mistakes were simply typos, but in coding every single character counts and has its own meaning so they still caused my code to fail.
Figure 1: This section of code is for the button to actually function. After wiring the correct circuit the button had to be plugged into the raspberry Pi into a GPIO or General Purpose Input Output. As you can see the 26 in the picture it was plugged in GPIO 26.
Figure 2: Code for the Dad Joke API. This is what allows the jokes to be called manually or by the button. To call them manually you have to run the program (./Dad-Jokes.sh) and it prints one joke but with the button you call the shell script I wrote (./button.py). Every time you push the button it prints out another button.
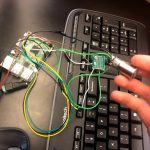
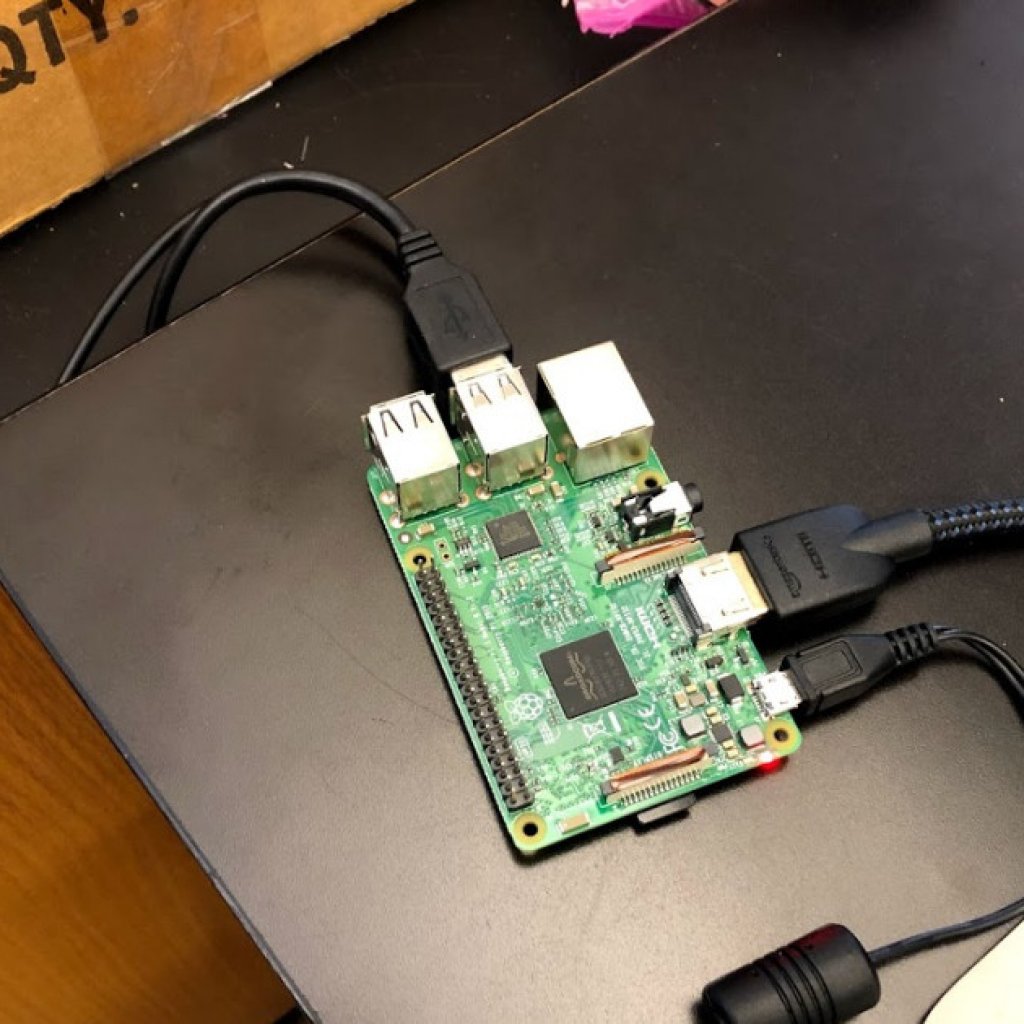
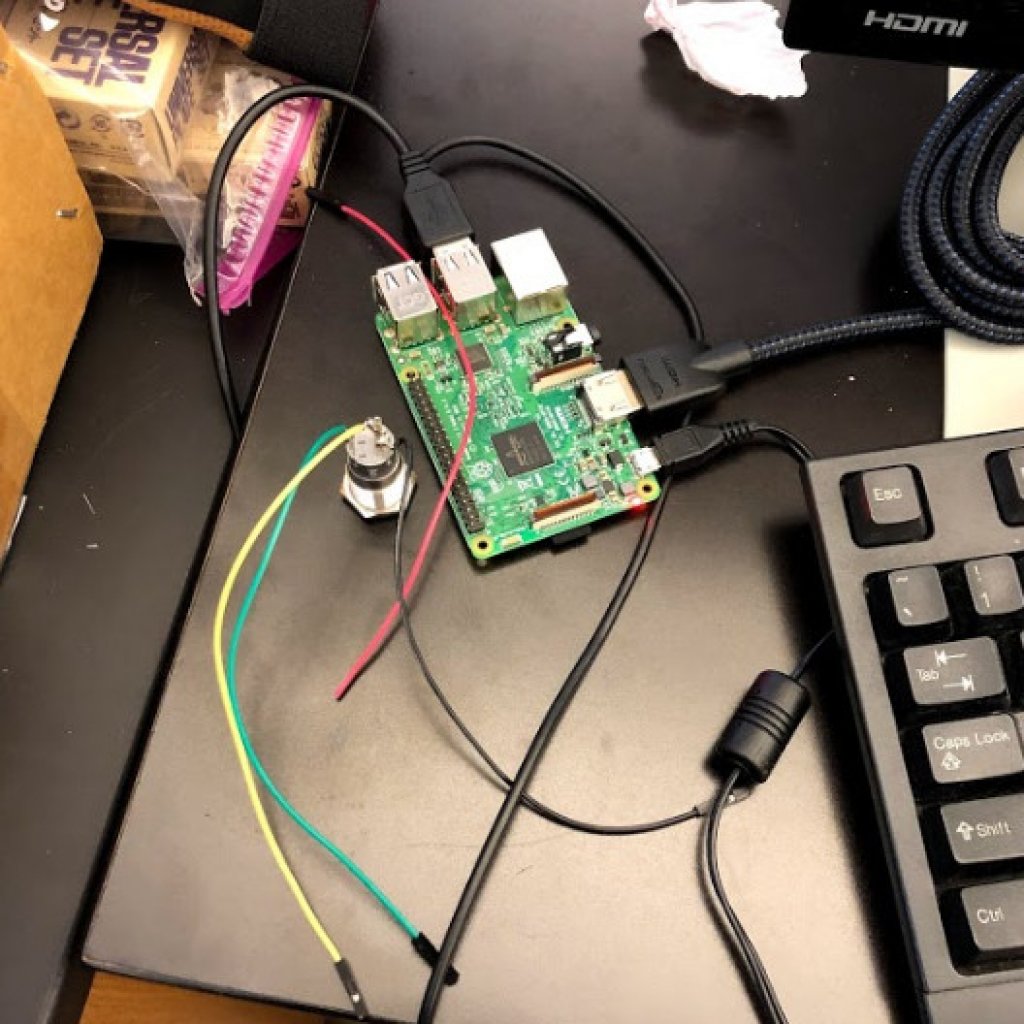
Figure 3: All the wiring attached to the raspberry Pi connecting the button, power cord, monitor and soon the Printer
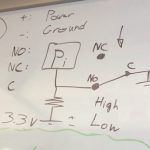
Figure 4: Schematic of the LED button. This is the circuit that allows the LED in the button to light and send data to the Raspberry Pi.
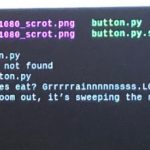
Figure 5: Just an Example of a joke. This is an example of manually calling the API
FIRST MILESTONE
MY PROJECT IS JOKER BOX THAT WILL PRINT OUT A JOKE WHEN A BUTTON ON THE BOX IS PUSHED. FOR MY FIRST MILESTONE, I HAVE FINALLY COMPLETED THE SETUP FOR THE RASPBERRY PI THAT I WILL USE FOR GETTING THE JOKES.
The Raspberry Pi is functionally a computer with its own memory and processing. The Raspberry Pi is now connected to the printer and will be able to print things from commands along with power to both the Pi and printer. The process in which I did this may seem difficult but for me it was just a lot of reading and writing. First I hooked the Pi up to a monitor, keyboard, mouse, and power. When it turned on initially the first thing done was the set up such as its new name and password. After the beginning set up I wrote all the code for the Pi that was needed (https://www.raspberrypi.org/help/noobs-setup/2/).
From this experience I have learned ways to communicate through the terminal interface on the actual Raspberry Pi itself. Terminal is basically an emulator system that allows me to run the Raspberry Pi as if it’s a computer by using command prompt. I never knew that a terminal was accessible from chromebook. I not only learned that, but I know how to use it somewhat now. It was a very long and complicated process that I made many mistakes on mostly typing. In terminal every character is specific to its meaning so one mishap or skipped word means big trouble. But it just taught me to check my work and do not try to rush through it. Something else that was really major in this milestone was the process of installing NOOBS. NOOBS aka New out of box software is a software that allows for the Raspberry Pi to be setup without a network. It is an operating system or the very basis of all computer interactions, and it basically allowed me to get my mini computer working so I could, from there, get it connected to the thermal printer. From here out I will be building the case and giving the printer power to test run it. This is an important part of the project because this is the use of the Raspberry Pi without this step this project wouldn’t be able to print or connect to the internet.
For my first milestone I have completed all the coding with the Pi. The only left to do is find or make a joke website for the Pi to use to send jokes to the printer.
STARTER PROJECT
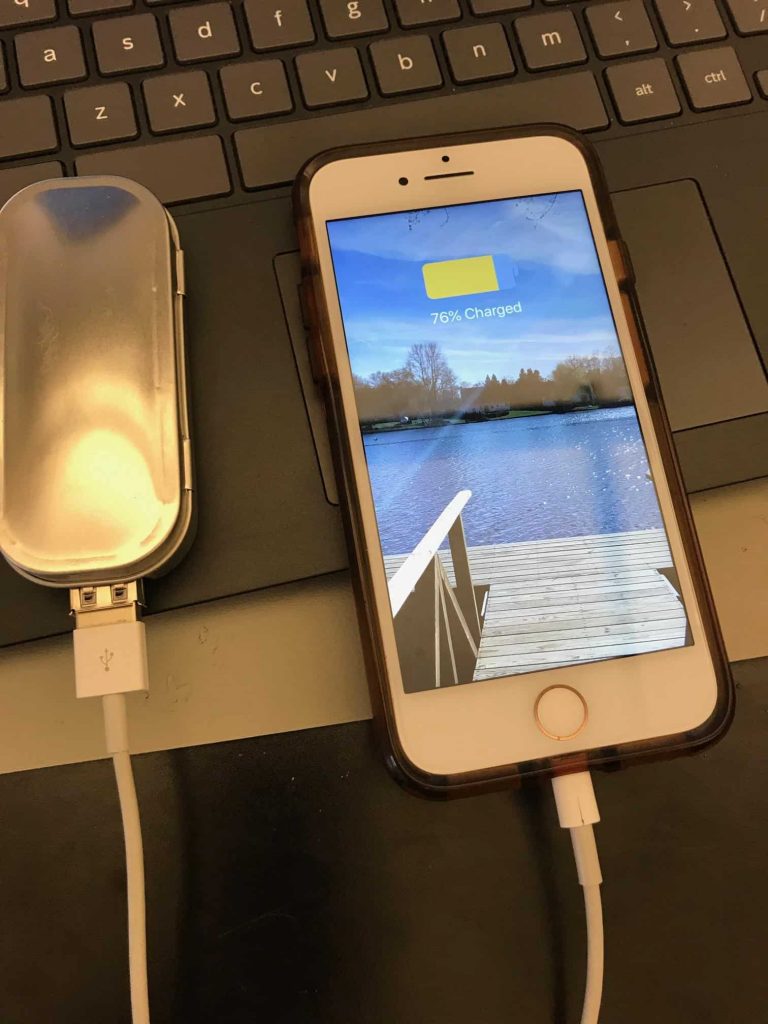
My project is a Phone charger that works for Android and IPhone by using two AA’s batteries, the MintyBoost (https://learn.adafruit.com/minty-boost/icharging). The circuit is soldered with multiple electrical components. Specifically, there are two inductors, a single capacitor, and many different resistor types. An inductor is a passive two-terminal electrical component that stores energy in a magnetic field when an electric current flows through it. A capacitor is a passive two-terminal electronic component that stores electrical energy in an electric field. A resistor is a device having a designed resistance to the passage of an electric current.
The batteries used does not have enough volts in order to charge a phone. The battery voltages are about 3V. So in order to get the 5V needed to charge a phone, there is a buck boost converter made with the electrical components.
The circuit diagram for the MintyBoost can be seen in figure 3. As you can see in figure 4, I first made a really big mistake. I soldered the charger adapter to the wrong side and when trying to unsoldered it I crushed it under the pressure of the pliers. I grabbed another MintyBoost kit to make and then it worked perfectly.
Overall I learned what inductors and capacitors are and how they can make a voltage increase together. I also learned how to solder metal together to make strong bonds between two things conclusively making a circuit and resistors; what they do and how they work.
My Starter Project is the MintyBoost, a portable charging device. When you plug in a device, it will charge it using two AA batteries!! I enjoyed this project because I learned about the different electrical components and their roles in this circuit including capacitors, inductors, and resistors. I also learned how to solder.
STAY CONNECTED TO BLUESTAMP
The BlueStamp Engineering Website is set to allow the use of cookies. Cookies help us to give you the best experience on our website. By clicking Accept or continuing to use the site, you agree to use our cookies. If you decline we will not track your information but your browsing experience might be limited. For more information on our Privacy Policy click here.ACCEPTDECLINE