Smart Mirror with Raspberry Pi
There are 3 components to the Magic Mirror: The mirror, the monitor, and the frame. The monitor is powered by a Raspberry Pi 3 that displays the Magic Mirror interface. The frame encases both the mirror and monitor to create the Magic Mirror illusion.
| Engineer | School | Area of Interest | Grade |
|---|---|---|---|
|
Frank L. |
Monta Vista High School |
Computer Engineering, Electrical Engineering, CS |
Incoming Senior |
FINAL MILESTONE/DEMO VIDEO
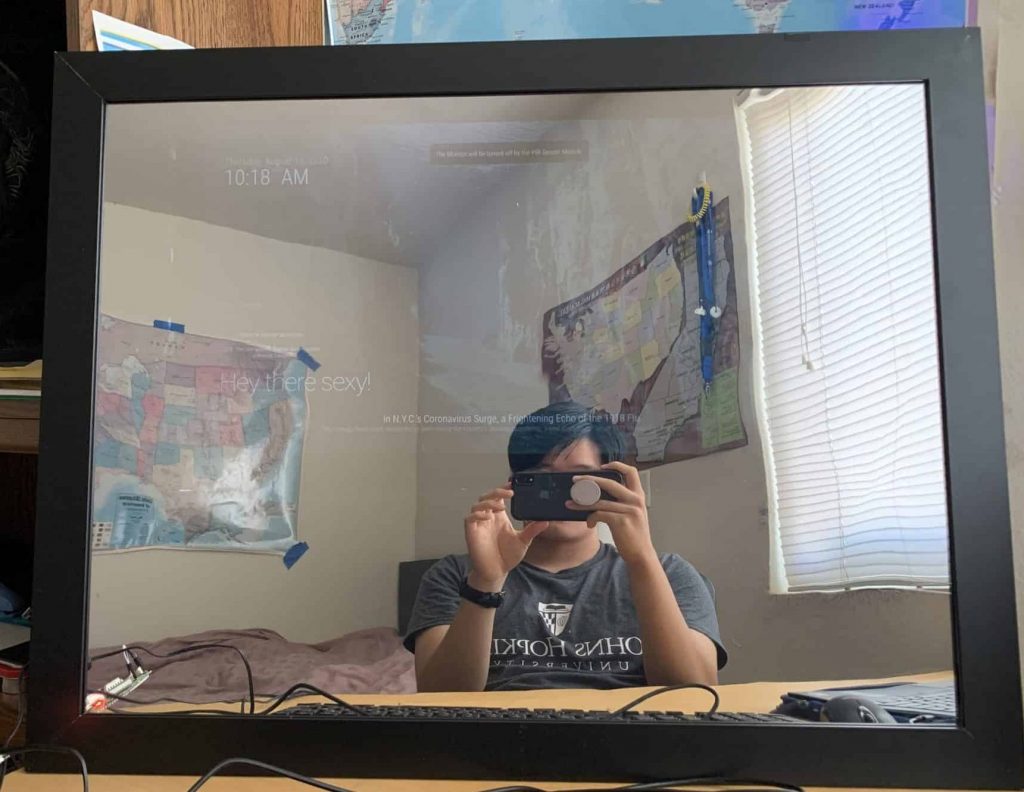
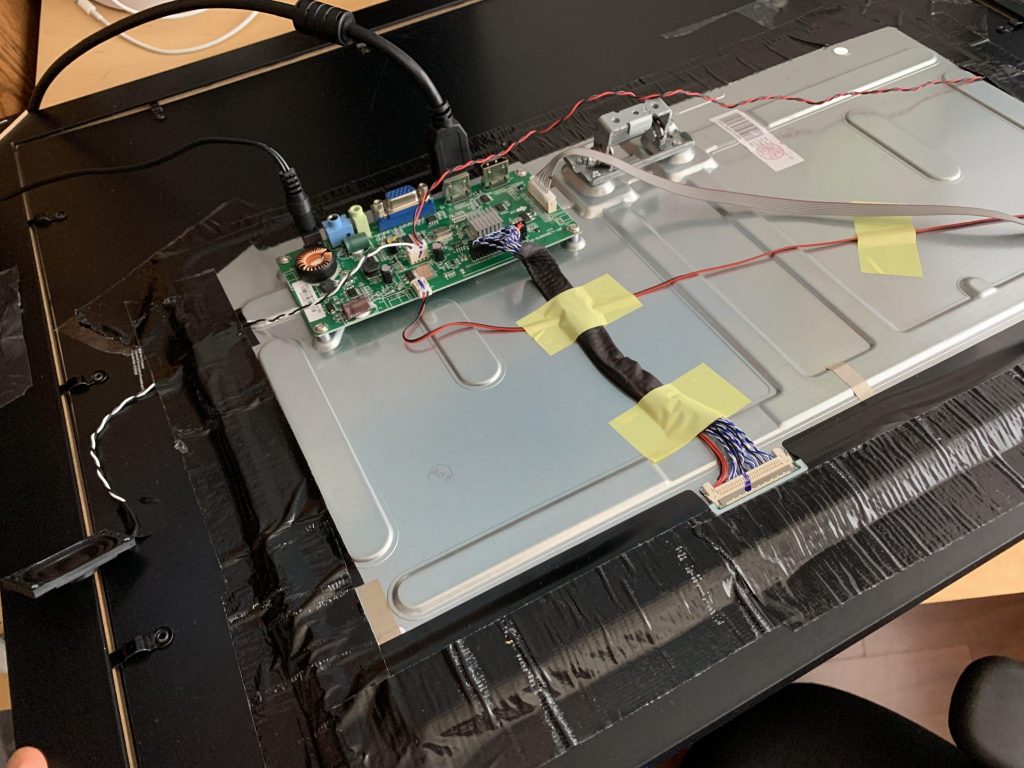
The last milestone of my Smart Mirror project was to assemble the smart mirror with the monitor, the frame, and the mirror. I got a premade frame that the two-way mirror fits into perfectly. Although the monitor was a lot smaller than the frame and the mirror, it wasn’t a problem as the display doesn’t have to cover the whole mirror. Since the mirror has to be secured in place, I cut out the shade of the monitor from the original backing of the frame. I used the layer of transparent glass that came with the frame as the outermost layer to protect the mirror. Then, I put the two-way mirror behind the glass and placed the backing at the end to hold the mirror in place. Then, I taped (not recommended but worked for me) the monitor with the backing of the frame to secure the monitor and prevent any light from entering. Lastly, I placed the monitor’s buttons to the top of the frame where I can access them and placed the speakers on the back of the frame. The main challenge I had was cutting the backing of the frame since it was very stiff and it took me a long time to cut using my scissors and knife. I tested all parts of the mirror and confirmed that the Smart Mirror was working flawlessly. This concludes my Smart Mirror project.
Note: The video is my demo video but the progress made through this milestone was shown in the video.
SECOND MILESTONE
The second milestone of my Smart Mirror project was to finish all the software parts of the project. This week, I continued to make additions to my array of modules. But, I mainly focused on two of the most complicated module of my magic mirror. First, I set up the microphone and adjusted it to the correct gain and volume. Next, I installed the “MMM-GoogleAssistant” module along with all of its dependencies. I created a project in the Actions Console and enabled Google Assistant API for the project. Then, I registered a device model, downloaded its credentials, and added the module to config.js. The second module I installed was the “MMM-PIR-Sensor” module. I then connected the sensor to the pins on the Raspberry Pi. I tested and adjusted the sensitivity of the sensor and inputted the pin number of the sensor to config.js. Unlike the first week, I faced a number of problems this week. First, I noticed that the weather information from the default weather modules(current weather and weather forecast) were incorrect and I spent some time trying to troubleshoot, but with no avail. I ended up removing those modules from the mirror. The second issue was just the whole process of installing the “MMM-GoogleAssistant” module. At the start, I followed the guides of an incorrect version of the module and I also faced some problems increasing the gain of the microphone. The last issue was that the PIR sensor didn’t register my motions at first. But, the sensor worked fine after I adjusted the sensitivity. Next week, I plan on assembling everything.
FIRST MILESTONE
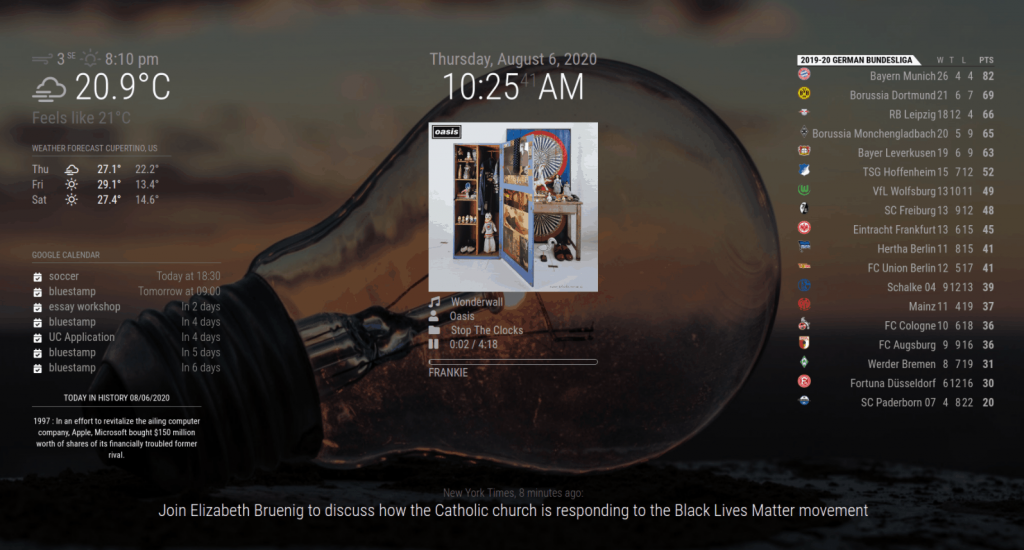
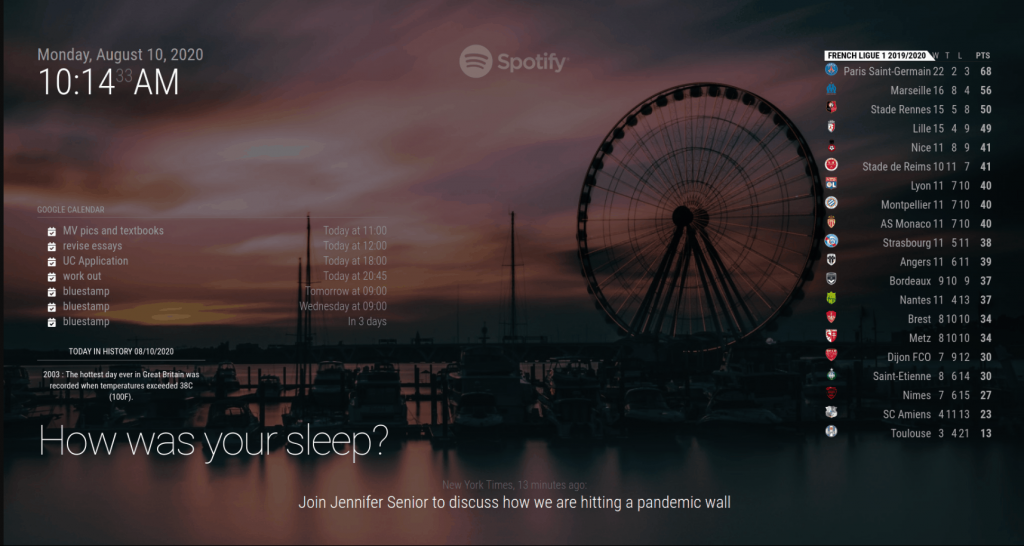
The first milestone of my Smart Mirror project was to have a simple, working interface by installing and setting up the Raspberry Pi, the Magic Mirror interface, and some simple default and 3rd-party Magic Mirror modules. I downloaded the Raspberry Pi Imager to the sd card and connected the Raspberry Pi, along with the keyboard and the mouse, to the monitor. Then, I installed the Magic Mirror interface, which came with a few default modules, on the Raspberry Pi. I set up the default modules in config.js with my location, timezone, and other customizations. Notably, I had to fetch the location ID and an API key from openweathermap.org for the weather modules. Next, I looked through the 3rd-party modules for any that I was interested in. This week, I chose to add some of the easier and simpler modules to my mirror. First, I added the “MMM-Cursor” module so that my cursor shows up when the magic mirror is launched. Next, I added the “MMM-History” module that displays a historical event that happened on today’s date. After, I chose to add the “MMM-Wallpaper” module that gives the mirror a more exciting background rather than a plain black one. Some of the more difficult modules I installed this week were “MMM-MyStandings,” “MMM-NowPlayingOnSpotify,” and “MMM-Screencast,” which displays the standings of my favorite sports league, shows the song that my Spotify account is playing, and screencasts a YouTube video onto the mirror, respectively. I faced minimal issues this week. The only problem I had was that when I added an analog clock to the default “clock” module, both the digital and the analog clocks stopped after a few seconds. So I had to remove the analog clock from the module. Next week, I plan on installing more complicated modules, like “MMM-GoogleAssistant” and “MMM-PIR-Sensor”, for the magic mirror.