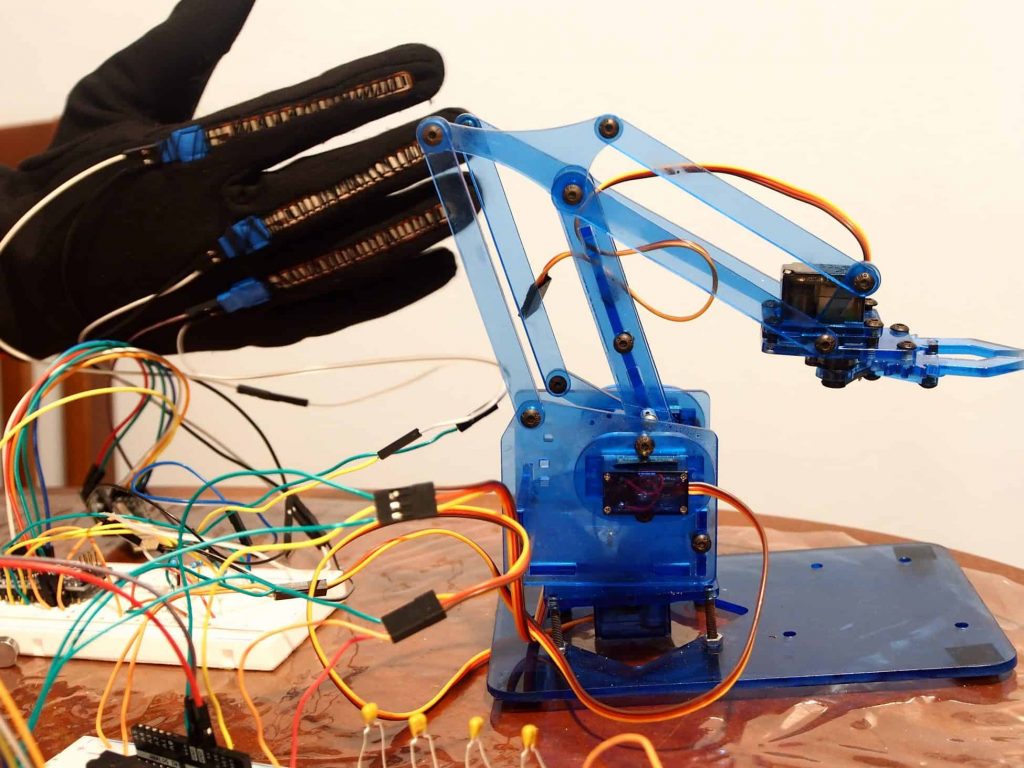
Phone/Gesture Controlled Robot Arm
Creating an app using MIT App Inventor to control a robot arm, as well as adding an arm gesture method of control.
| Engineer | School | Area of Interest | Grade |
|---|---|---|---|
|
Edgar S |
The Browning School |
Mechanical Engineering |
Rising Senior |
DEMO
FIRST MILESTONE
My first milestone would be to get the particle photon and my phone communicating. At first, I was going to use the Arduino and the HC05 Bluetooth module, but I was having difficulties getting it set up. I used the MIT App Inventor and the Particle Web IDE in order to code a simple command. In the MIT App Inventor, you have to use a web block to call a certain link “https://api.particle.io/v1/devices/Your-Device-ID/particle-function-name/?access_token=Your-Access-Token” Then when the App Inventor gets that URL, it will also need extra parameters which will serve as a command in the particle Web IDE code. This will all be programmed with the App Inventor blocks which allow you to build a URL piece by piece using Global Variables. To receive cloud functions with Particle and to get your access token you will need to download the Particle CLI and do “Particle Token Create” in the terminal. In the Particle Web IDE, you need to start an app and set up the particle function. To do this, use “Particle.function(“function-name”,function-nameToggle);” After that use “int function-nameToggle(String command) {“ and add the actions for each command with if statements. In my case, it would be: “if (command==”on”) { digitalWrite(led1,HIGH); return 1; With the press of a button on my phone, the LED on the photon would light up and with an off button it would turn off.
SECOND MILESTONE
My second milestone is having a slider on my phone, control the position of the servo attached to the particle. This is a big step in actually making the arm fully functional because all I need to do is attach more servos to the particle and the arm in order for all the joints to move. The code for this was similar to adding a button. On MIT App Inventor I added a slider and made it call a Particle function. To make things easier, I set it to be 0-180 so it can be turned directly into a servo position. Next, I made it send the position of the slider to the Particle IDE and turn that string into an integer using an “atoi” command so the servo can be set to that position. Since I have this working, my next step would be to actually assemble the arm and add more servos.
FINAL MILESTONE
For my Third Milestone, I have a working Phone Controlled Robot Arm. I have fully assembled the arm and have added the servos to it. The servos are connected to the particle as well as a different power source in order to fully power the arm. The MIT App Inventor app has the new sliders for each servo and the arm can now be controlled by my phone. For this milestone, I add more sliders and more web blocks to on MIT App Inventor in order to call more Particle functions. I had a power issue but I received a 3-12v wall outlet power supply which came with an adapter for the breadboard. I set that to 5v and plugged it directly into the breadboard on the side rail. I also added 4 capacitors to smooth out voltage and fix a stubborn problem I was having with the claw.
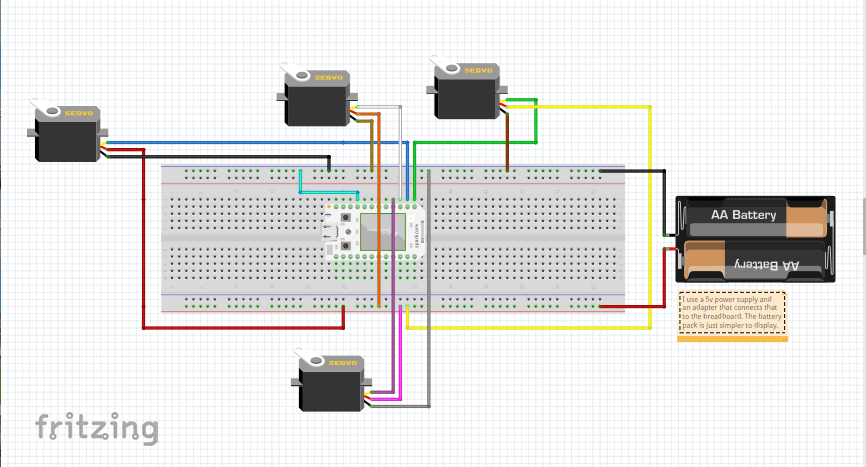
In this Fritzing diagram 4 servos are attached to the particle photon and a power supply. The power supplies used were not batteries. I used a 5v wall outlet supply that plugged into the breadboard with an adapter, but I could not find this specific one as an option in the fritzing application.