Video Game Emulator
From playing video games on my free time to playing competitively with friends, when it came time for selecting a project, video game emulation was on the top of my list. There were many different options that piqued my interest. A magic mirror, to a robot arm, and many more, however, my love for videogames from a nostalgic viewpoint made me rush into choosing it. The emulator is capable of running Roms or read-only memory of old videogames and enables the user to play them.
| Engineer | School | Area of Interest | Grade |
|---|---|---|---|
|
Sahil T. |
Newtown High School |
Software/Hardware Engineering |
Incoming Senior |
DEMO NIGHT
Overall, my project was really fun to make and really engaged me to work my hardest when somethings weren’t working. I really had an amazing time soldering the wires for the new controller, connecting the wires, and rearranging them on my first controller. It was a very enjoyable six weeks here and I am really glad to be a part of Bluestamp and to make so many fun memories but also to learn as well. Despite facing difficulties, it all ended up working out just fine.
THIRD MILESTONE
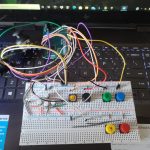
My third milestone was making a custom controller, using an Arduino Leonardo and an Arduino library that allows you to make a joystick with various buttons and joysticks. On the Arduino Leonardo, there are various places where you can input the wires. There is a digital side and there is an analog side.Digital signals have a finite set of possible values. Like a light switch, it can either represent on or off. However, with an analog signal, you have a continuous signal for which can result in varying outputs. The input on an analog switch(joystick) is based on the position of the joystick in relation to the default position in the center. Using this information, the digital input is the place where you would connect the various buttons. This is because when you press the button, it changes the value to 1, when you depress it, it changes back to 0. With the analog inputs, you can use wires to connect the joystick. The reason why the joystick is analog is because the joystick works on an axis. With an axis, you are able to see what the exact value is when you move the joystick around. This range usually falls between 0 to 1023. Using Arduino, you can code and map where each button is and connect them with a breadboard and wires. As previously mentioned, the Arduino library allows you to use the Joystick library to simulate a joystick and you can program it so that it allows you to map out different input and allow you to use and map them within various different controllers.
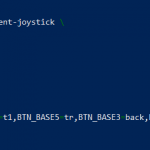
SUDO GRANTS THE USER SECURITY PRIVILEGES THAT ALLOWS THE USER TO EDIT THE CONFIGURATION FILE. THIS CHANGE MAPS THE SPECIFIC BUTTONS OF THE CONTROLLER.
SECOND MILESTONE
My second milestone was downloading my first ROM onto the Retro Pi. As stated before, ROMS are Read Only Memory. They are digital copies of games that allow you to run the ROMS on emulators such as Retro Pi. There are 3 main methods of transferring ROMs: via USB stick, via SFTP, and via Windows (Samba) shares. The method I used was the USB since it was easier and more practical. The first step is to format the USB stick into exFat or FAT32. Once it’s formatted, you need to create a folder called retropie on the USB stick. Once the folder is created, you can plug the USB stick into the Raspberry Pi with the retro pie OS and wait until the flashing light on the USB stick is done blinking. Once that is done, you can remove and plug the USB stick back into your computer and there should be new folders. The folder you need is the ROM folder. Within the ROM folder, there are more subfolders called atari2600, GB, GBA, GBC, mame, nes, and so on. As you can see, the ROMS folder has their respective video game systems, and whatever ROMs you have, you can put them into their respective folders. Since Mario is Nintendo, you can put the ROM into the nes folder for Nintendo Entertainment System. After the ROM is in the folder, you can plug it back into the RetroPi and restart the system. Once everything is booted up you will notice that there is an NES section with the game.

FIRST MILESTONE
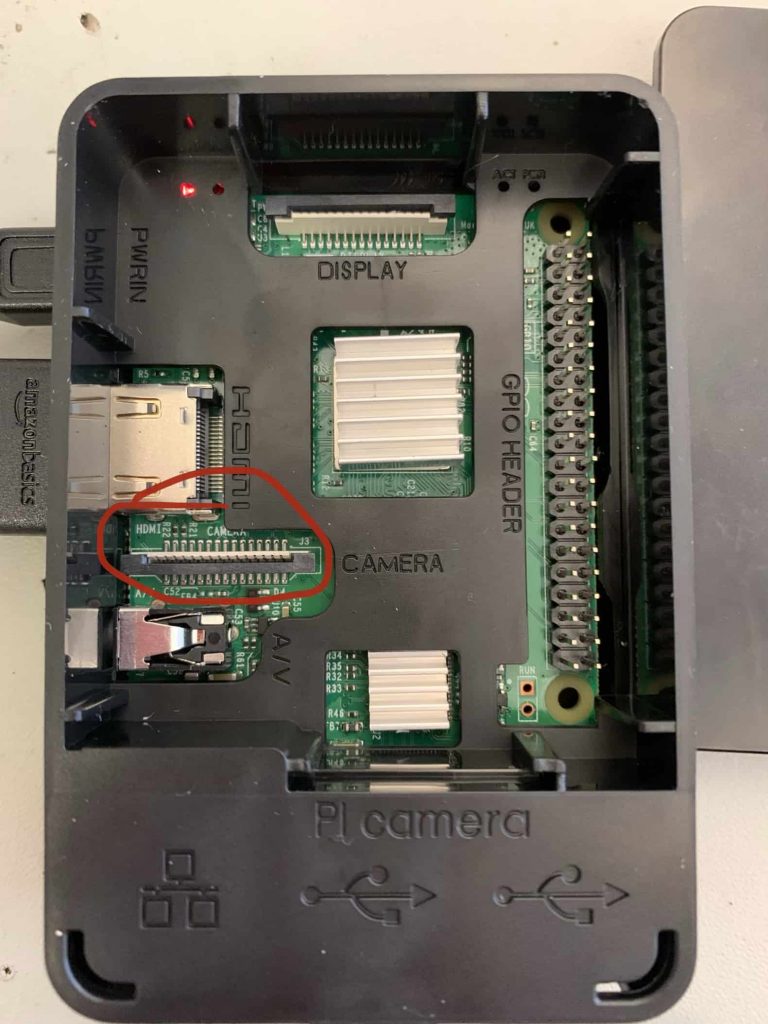
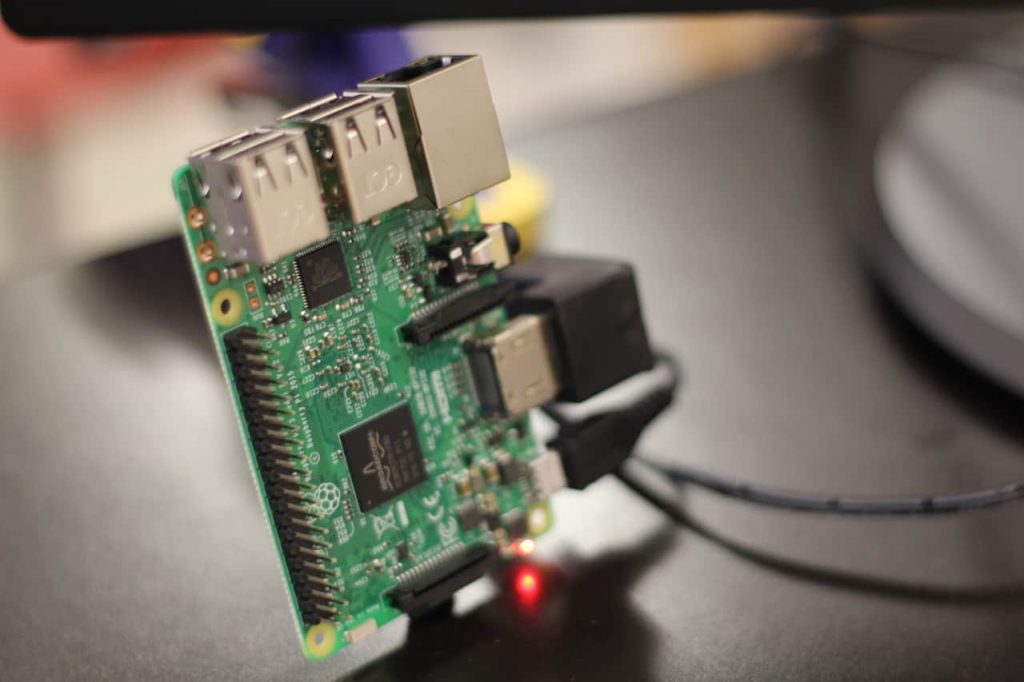
My first milestone was setting up and hooking up the Raspberry Pi and all the necessary components onto my tv. The heatsinks, the sd card, and the controller were all added to ensure that the Raspberry Pi was working. Instead of the Raspberry Pi Os software, I had to first download a different software called Retro Pie. With Retro Pie, I needed to download an Imager for Raspberry Pi. Raspberry Pi Imager automatically downloads a list of the latest versions of Raspbian supported by the Raspberry Pi. Raspbian is the typical Raspberry Pi Os software, the one I needed on the Raspberry Pi was Retro Pi. With the included SD card, I plugged in the SD into my computer and launched the Imager. The imager allowed me to set the Operating System to Retro Pi instead of Raspbian onto the SD card. With the OS imaged onto the SD, I plugged the SD card back into the Raspberry Pi and rebooted the system and Retro Pi booted up.