Multifunction Matrix Clock
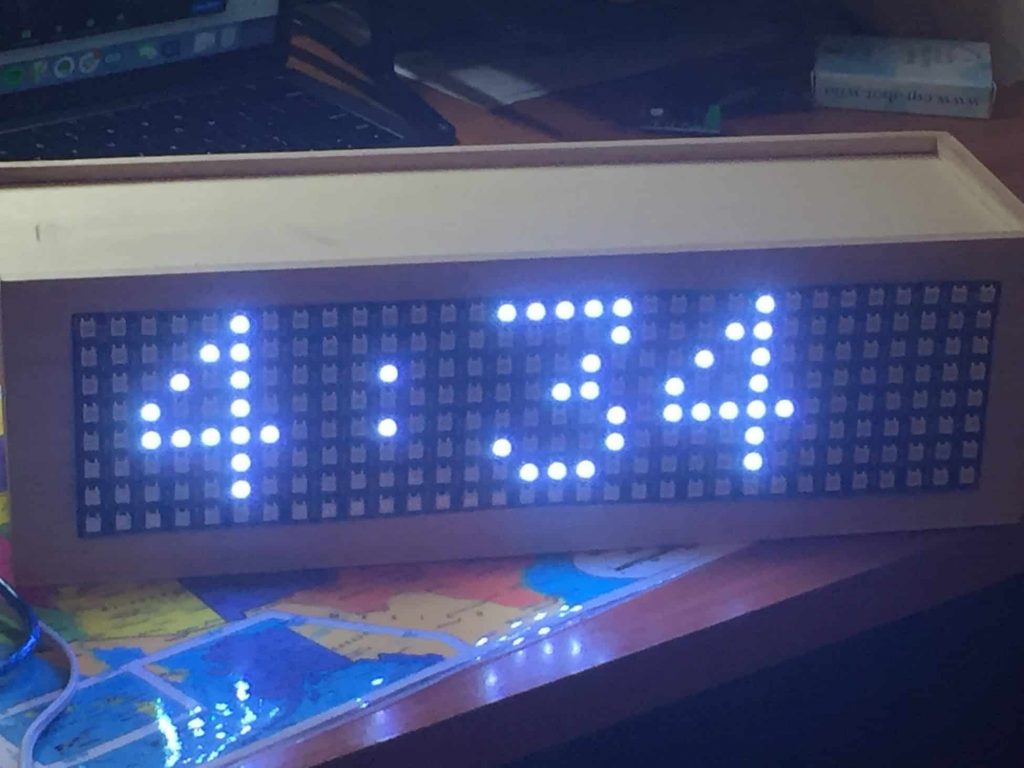
My matrix clock showcases eight different scrolling displays including the current time, date, and temperature. It utilizes a real time clock module and a humidity sensor to gather data, report it to the Arduino, and print it onto the matrix panel.
| Engineer | School | Area of Interest | Grade |
|---|---|---|---|
|
Sabina S. |
Foothill High School |
Mechanical and Software Engineering |
Incoming Sophomore |
DEMO
My final milestone is putting all my components for the clock in my case, which is a wooden wine box. I also attached a speaker to my Arduino that plays a custom hourly chime between the hours of 9 am and 8 pm. While I was fitting and drilling holes into my case for the matrix, I accidentally pulled off some of the connecting wires; so, I had to solder them back on. Additionally, I had problems with my matrix displays which turned out to be caused by bugs in the some of code I modified. I ran into some wiring issues while I was fitting all of my components in my box; some of the cords connecting to the matrix from the Arduino were detached, and so I needed to solder those back on before moving forward.
FIRST MILESTONE
My first milestone is lighting up my entire matrix; I used the NeoMatrix Library to create the flashing rainbow patterns. I originally worked with a NeoPixel strip to get aquatinted with how the Arduino functioned. The process of wiring and programming the strip was very similar to my milestone goal, powering the matrix, so it was a simple transition between the strip and panel. The greatest challenge was to make sure I was not going to short the Arduino or the NeoPixels out by overloading the power capacity. Now I am going to work on printing words on the matrix.
SECOND MILESTONE
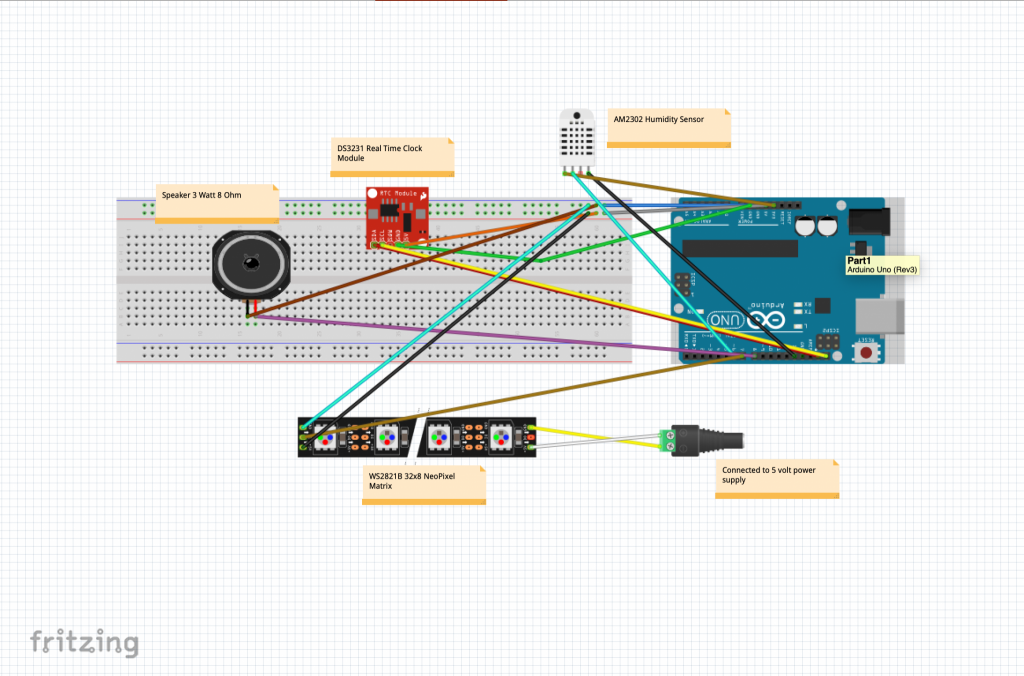
My second milestone is displaying the time, day of the week, date, temperature, humidity, and a greeting (Good morning, Good Night, etc.) on my matrix panel. I started off by programming my matrix to scroll “Hello”. Then I attached a real time clock module and had it print the date and time in my computer’s serial monitor. From there, I redirected the RTC’s data to have it print onto my matrix panel. I used the same process with the humidity sensor as well. Once I figured that out, all I needed was to program my data to scroll on my matrix at different intervals. Now I am working on different modifications for my clock, such as connecting a speaker to add hourly chimes.
THIRD MILESTONE
My third milestone is adding events as the last display on my matrix clock rotation, programming the matrix to automatically dim at 8:00 pm and light up to full brightness again at 7:00 am, and fixing a bug that started my displays in the middle rather than on the right side. In order to show an event, I specified the day, month, and text I want the matrix to print. That way that specific event will only display at that day of the year. I figured out that my displays were dependent on the previous ones, which caused the displays to start in the middle of the matrix. Once I was able to figure out why there was a bug, I pinpointed what I needed to do to stop that from happening, which was making the displays independent from each other and always starting on the right side of the matrix. My next step is attaching the speakers and creating the chimes.