Hand gesture controlled car
This project uses a raspberry pi micro controller and python code to run hand gesture recognition software with a pi camera. I use this software to control a robot car with basic hand gestures.
| Engineer | School | Area of Interest | Grade |
|---|---|---|---|
|
Raj T. |
Avenues |
Electrical Engineering / Computer Science |
Incoming Junior |
FINAL MILESTONE
My final milestone is controlling my robot car with my hand gesture recognition software. The robot car I worked with is the Lheng 2WD smart motor robot car. It is composed of two motors and two wheels and chasis. Once I assembled it I had to hook up four wires from the motors in a motor driver. I then used a single 9 volt battery to power the robot car. Once all the assembly was done I had to add some code to my program and connect the raspberri pi to the motor driver. For my code I used my already existing hand gesture recognition logic to controls the motors in a way that matches the gesture being given. When the pi camera recognizes a closed fist both motors on the car stop running. When it sees fingers pointed to the left or right the car turns in that direction. The number of fingers being held up changes the speed at which the motors turn, and this also applies when turning left and right.
SECOND MILESTONE
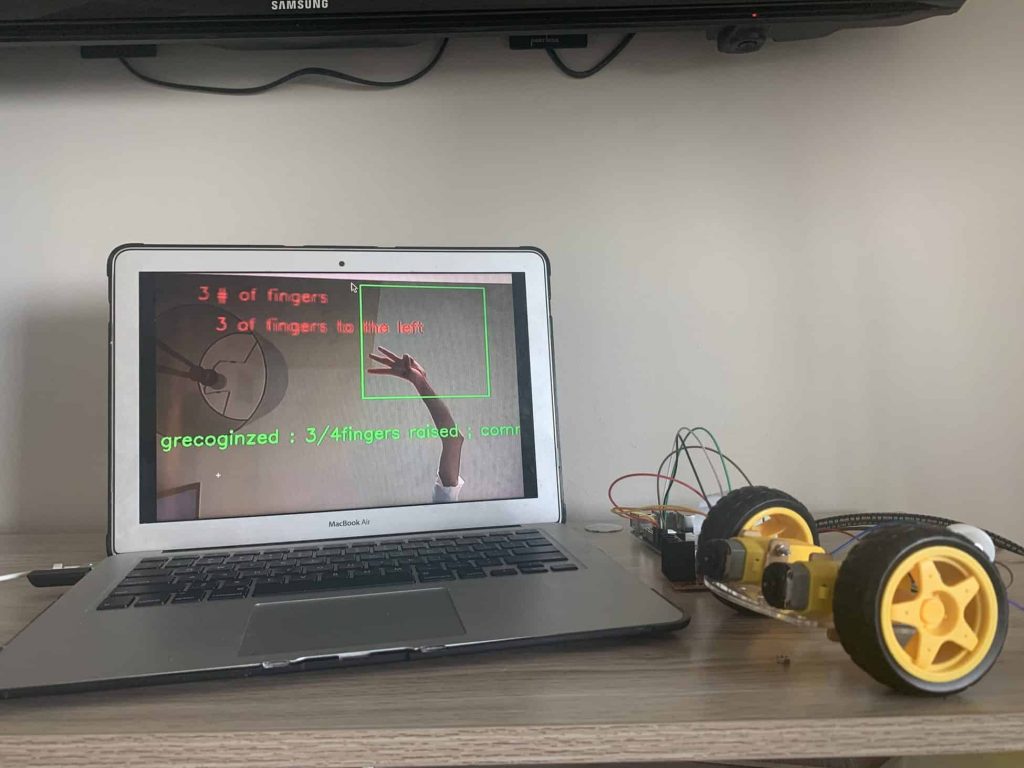
My second milestone was getting the object detection to recognize hand gestures. The first step of this process was getting the camera to recognize and segment a hand in order to count the number of fingers that are being help up. This was done by using a variety of skills such as background subtraction, thresholding and more. After the hand is segmented it takes four steps to start counting the number of fingers being held up. Essentially the program is creating a circle around the detected hand and recognizing the fingers that are on the circumference. I had to code some of the functions myself because the referenced libraries were unable to be installed, but in the end I was able to run the code and count the number of fingers being held up. From there I was able to the get the detection to recognize the fist, pointing to the left and right as gestures. With all the framework ready to go my final step will be to integrate all of this code to my car and be able to control it with the hand gestures.
FIRST MILESTONE
My first milestone was setting up my Raspberry Pi and all the necessary components onto my tv, and then using it to do some basic object detection. My first step was to downloaded the Rasberry Pi software onto a sd card. I then added heatsinks and the sd card to the Pi and connected my mouse and keyboard. Finally, I connected the Pi to power and it was ready.
Next I had to hook up my camera to the Raspberry Pi. Once it was connected I tested the camera by taking photos and videos by running python code. Now that all the setup was done I started doing some research on the basic principles of object detection. Once I understood that I got to work on using my camera to detect basic objects with my Raspberry PI.
I had to install three main programs and their related packages, and their names were tensorflow, opencv, and protobuf. One particular important part that I installed was the SSD_Lite model from the tensorflow detection model zoo. The model zoo is a collection of Google’s pre trained object detection models. It works well with the Raspberry Pi’s weak processor because this model takes less processing power. Once I had everything installed and set up I was able to get the object detection up and running. It is able detect basic objects and display a box around them and shows the certainty of the model.