Phone Controlled Robot Arm
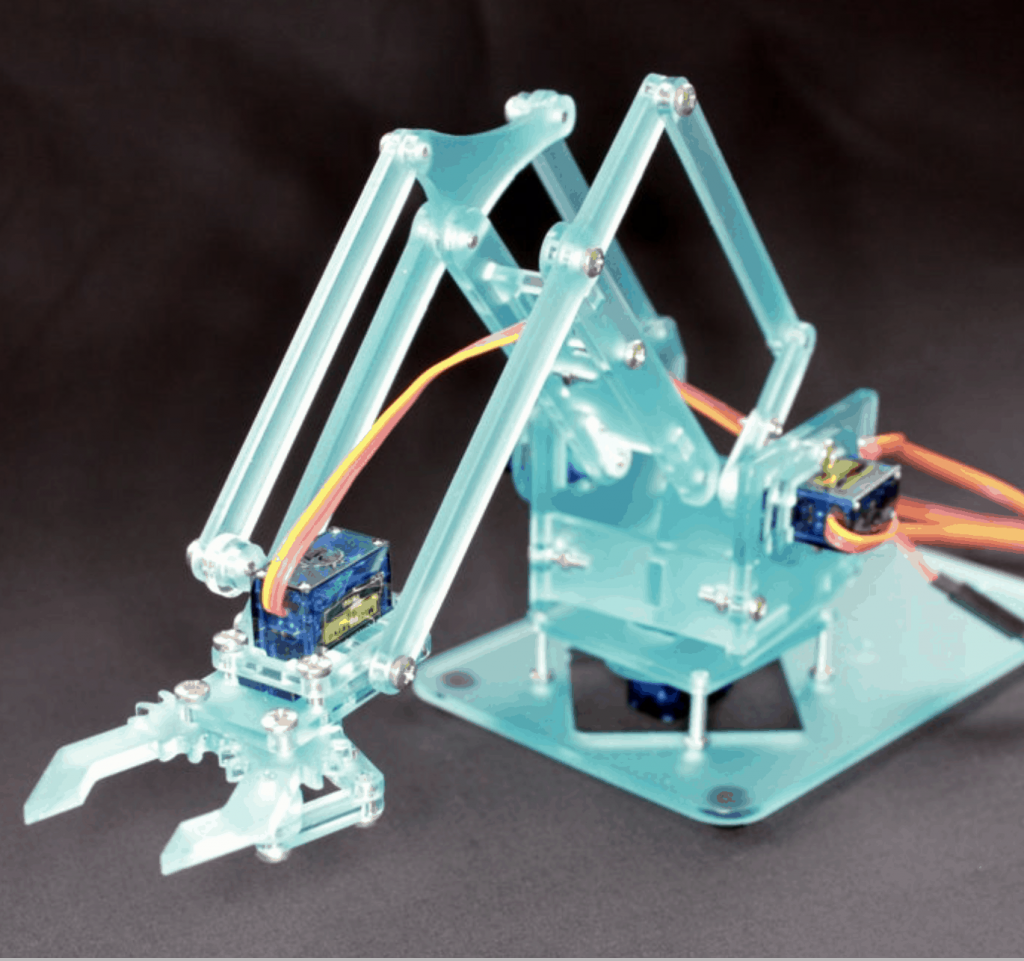
The Phone Controlled Robot Arm uses various parts including servos, an Arduino, and 3D printed arm pieces. First you build the physical arm. Then, using a Bluetooth Module connect it to an android device and finally you create an app using MIT App Inventor that can remotely control the arm using sliders
| Engineer | School | Area of Interest | Grade |
|---|---|---|---|
|
Neela M. |
College Prep |
Finance/ Environmental Engineering |
Incoming Sophomore |
THIRD MILESTONE
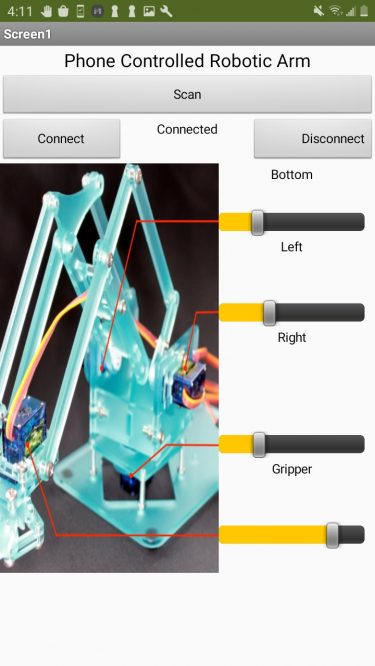
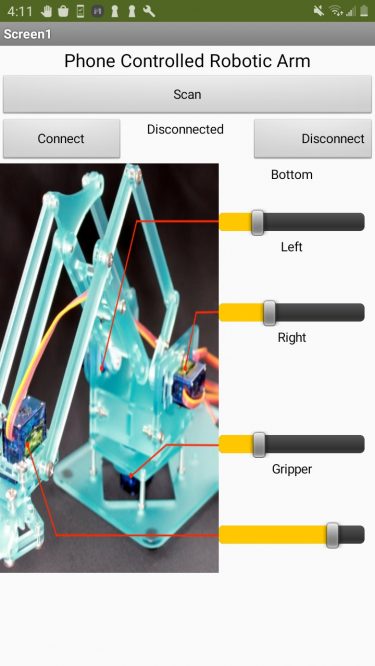
For my third and final milestone, I created an app that controls the robot arm using sliders. To develop the app, I used MIT App Inventor. I designed the app’s user interface and then added blocks so that the app would know when to send a text to the Bluetooth Module.
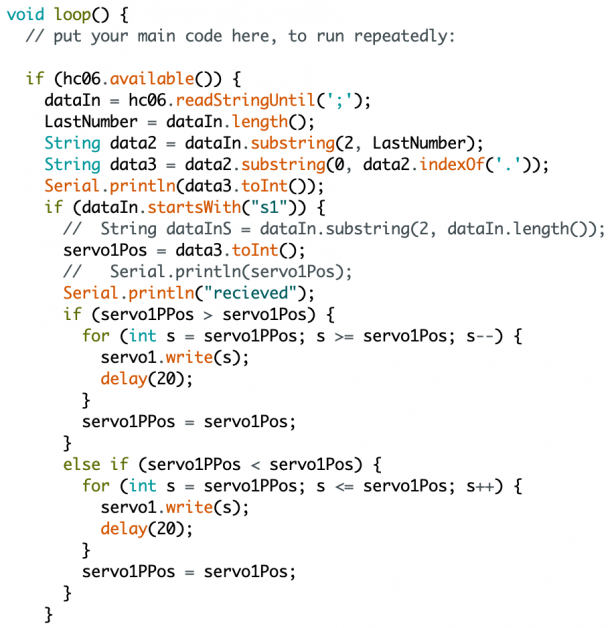
This milestone took me the longest to complete. When I first began writing the code that would allow the servos to react to the sliders, I made multiple mistakes. When I coded, I wrote the code so that if the servo’s initial position was larger than the new one, the servo had to subtract the number of degrees it would go. Then, vice versa, for if the new position was greater than the previous one. However, each time the code ran, it reset the initial position to the previous position. Therefore, the arm would not move from its initial position, but instead, the one it started from. I fixed this issue by after the for loop – for each servo – ended, I wrote that the previous position was equal to the current position. When the code ran again, it would redefine what the last position was.
Another issue I had was getting the Bluetooth Module to read the texts correctly. Initially, I programmed the Arduino so that when it received the texts, it would rule out the s followed by a number which indicated which servo I wanted to move and then read the numbers for where I wanted each servo to move. However, the Arduino did not know where the number stopped. For example, the servo would move only to five degrees instead of 50. I solved this problem by adding a semicolon after each line of code. By simply telling the app to send a semicolon after each line of code, I could then tell the Arduino to read each line of code until a semicolon appeared.
After this issue occurred, I learned to go through my code step by step to see what each line of code does and where the gaps in the code might be. By using this process, I found the final error in my code. When I was initially writing the code, I copied and pasted it for each servo. However, this meant I had to change the numbers for each servo; otherwise, the wrong one might move. I realized that I had forgotten to change some of the numbers, so when I meant to move the fourth servo, I accidentally moved the first.

SECOND MILESTONE
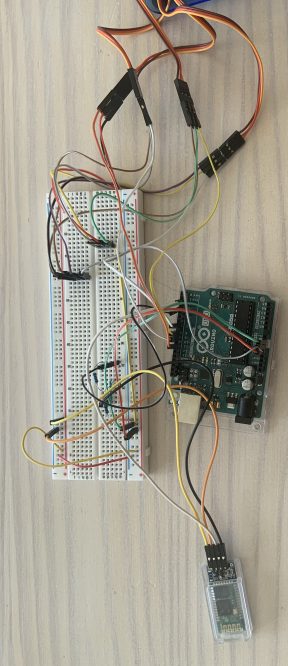
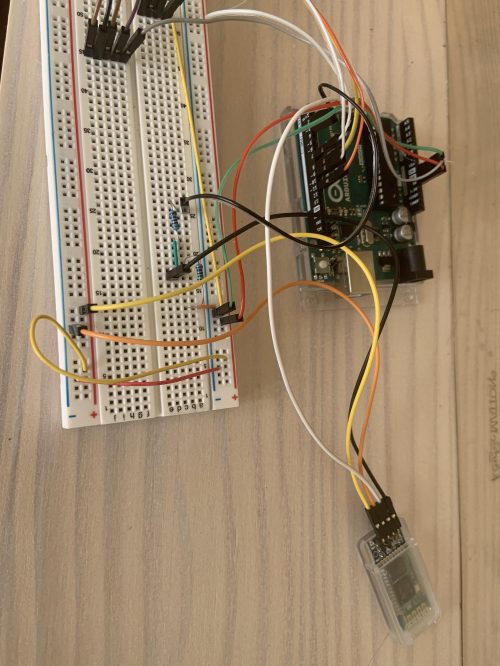
For my second milestone, I completed building the arm and incorporated the servos as joints. I also wired up the Bluetooth Module and ensured that it could connect to the phone. Finally, I ensured that all of the servos worked and that they would run when I sent something, for example, a 5, from the phone.
For this milestone I ran into a couple of issues. When I was finding my resistors to wire up the Bluetooth Module, I miscalculated the ohms each resistor needed. This did not lead to any significant issue; however, it did cause me to lose some time, as I was looking for the necessary resistors and attempting to figure out the closest possible resistance I could get with the resistors I had. From this, I learned that it is often useful to double-check what you did the first time was correct, especially if researching online, the resistors do not appear to exist, and others have done the same thing as you.
My second issue was getting the servos to work. When I connected the phone to the Bluetooth Module and sent in a number, the servos would only jerk around, and one began to make a loud sound. Instead of automatically unplugging it, I kept the servo running, which led to me possibly momentarily frying the servo. After that, I began to replace servos when the arm did not work without considering that possible the servos worked and that the issue was instead mechanical. When I finally spun the servos without attaching them to the arm, I realized I had screwed some of my joints too tight, and there was not enough force from the servo to move the arm. I realized that you should consider a problem from multiple angles and slowly rule out all possibilities until you find where the issue is. Therefore, you end up spending less time on the issue, and if you need to ask for help, it is easier for the other person to help you.
FIRST MILESTONE
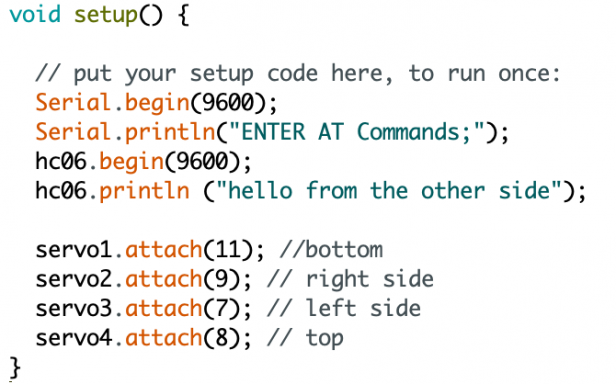
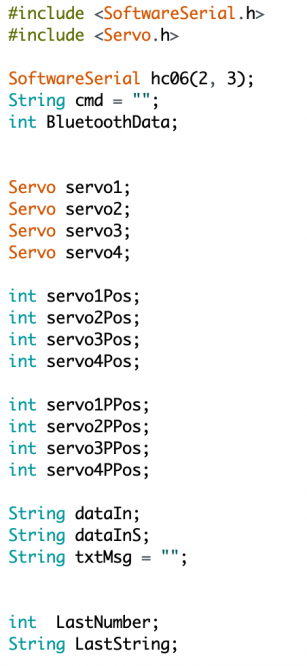
For my first step, I used a microcontroller(Arduino), jumper wires, servos, and a breadboard. The first thing that I did was hook up the servos to the Arduino through the breadboard. For the software, I used Arduino (IDE) to code the information that tells the servos to move and by how much. The goal of this milestone was connecting the servos to the microcontroller. Writing the code included defining each servo’s names, telling the Arduino where each servo was plugged into for it to know where to send the code, and then finally putting in the angle I wanted each one to rotate. The first code I wrote used the function servo.write(). I later updated the code so that each servo would turn a specific amount of degrees and then back to its initial position.
This milestone took me the shortest amount of time to accomplish. The only error I ran into was when I named each of my servos the same name. Confusing the program as it did not know which servo to move.
HOW TO CUSTOMIZE THE MODULES
All the customization is done in the config.js file within the MagicMirror folder. However, if I wanted to use a third party module, I would have to clone the repository into the MagicMirror/modules folder first. In the config.js file, I can choose where to display the module (top_left, center, bottom_bar, etc), the header, and the configurations specific to the individual modules. The configurations can be found at the GitHub repository.
Most modules use an Application Programming Interface. An API is set of protocols and routines to build software applications. For example, I use Twitter’s API. There are two types: Rest API (Data Base) and Search API (Connects to my account). In order to use an API, I needed an API key. API keys are used to track and control how to the API is being used i.e to prevent malicious use of the API. It also acts as unique identifier and as a secret token for authentication.
Every single module on my MagicMirror uses an API because I wanted a customized interface that suited my personal needs.